First part of the LookyCreative Timelapse Compendium. Learn what is timelapse and how to make your first steps.

This chapter is devoted to basics of time lapse technique, it’s history and applications. It will give you also an overview of the equipment needed. The following articles will get lot more into details – I’ll speak more about the gear, practical aspects of shooting, post-production and will share my know-how and experience with you.
Time lapse is a name of the cinematographic technique where each of frames of the final film is captured in much longer time or in much longer intervals than it is displayed. Therefore time lapse is an opposite of high speed motion technique, which captures the real-time action with extremely high speed and displays it much slower giving the effect of slow motion. Time lapse should also not be confused with stop motion.
Due to the perceptive impression of speeding up the time, the time lapse technique makes it possible to perceive and stress the processes that pass unnoticed in the everyday life, such as motion of the clouds, the revolution of the night sky, stars, moon, as well as growth of plants, trees or passing of the seasons.
Application of the time lapse technique is not limited to capturing the nature. It might be used also to capture such events as building of the various devices, building, the life of cities etc. Time lapse is nothing else but a technique, thus it does not relate to any particular subject. Its range of applications is limited only by the imagination of shooters.
Time lapse is almost as old as the cinema is. The first time-lapse film would be the Carrefour De L’Opera by Georges Méliès dated to the end of nineteenth century. The first nature-devoted time-lapse films were produced around twenties. Time lapse bloom is a matter of fifties and such films as “Secrets of Life” by Walt Disney produced in 1956.
Contemporary masterpieces are mainly the “Quatsi” trilogy by Godfrey Reggio:
as well as films by Ron Fricke, a cinematographer that worked with Godfrey Reggio on Kooyanisquatsi:
A still from Koyaanisqatsi (1983)
A still from Powaqqatsi (1988)
A still from Naqoykatsi

A still from Baraka by Ron Fricke
The time lapse technique has also been used in many documentaries and series such as “The Planet Earth” by BBC or “Microcosmos“.
Of course there’s much more examples of the time lapse application, but it is not a subject of this article to recall all of them. Nowadays the technique is used by a wide range of productions by cinematographers and producers around the globe. It is also used in numerous commercials.
Time lapse technique can be learned in a few minutes, but it takes lifetime to master it. In this chapter I’ll give you a short overview of the gear needed to create time-lapse sequences. The details will be covered in next chapters. Of course in order to create masterpiece shots which can be admired in such films as “The Planet Earth” you’ll need a lot of gear as well as know-how and experience. But even the simplest time-lapse sequences shot using your cell phone may give a lot of pleasure and push your creativity. What will we need?
In fact, you don’t need a camcorder to create time lapse. Unless you own a $25K RED ONE it is even not the best choice. Ideally you should start with a DSLR camera, but depending on your budget and expectations you can start even with a cellphone, a compact camera or an amateur DSLR. If you’re heading for great results and professional level of productions you’ll probably want to start with Canon EOS 5D, 7D or similar. Let’s have a closer look at these options:
A minimum time lapse requirement is a cell phone capable of shooting pictures. A standard nowadays. An iPhone would be great, but it is a bit expensive. Anyway, if you own one, it is enough to buy a 0.99EUR “TimeLapse” application by xyxter.net. It will let you achieve the following results:
All you need to do is charge your iPhone, stabilize it (you have a lot of DIY options) and launch the app. Needless to say the quality of picture will be far from stunning, the tonal range will be low and the sequence will flicker, but it will let you enjoy your first steps.
You can use a compact digital camera as well. The choice of devices is great, so you’ll have to find your own way, especially as the models change almost every day. You can buy some old cameras really cheap and their resolution in most cases will be enough to shoot even an HD time-lapse sequence. Choosing a compact camera for time lapse you need a device that has a built-in intervalometer or can be controlled from a laptop. A minimum is a continuous shooting mode and a shutter release cable.
An affordable but less available solution are an old compact cameras such as Epson PhotoPC 800 (~$100) or Epson PhotoPC 3100Z, (~$150). These can be still found on eBay and their advantage is that the built-in intervalometer does not limit the number of shots. PhotoPC 800 allows you for shooting every 10s and more, a 3100z – 5s or more. A 3100Z gives you also a full control over the exposure settings. A manual exposure control mode is particularly important, because it prevents your time lapse from flickering which appears alwas on auto exposure modes.
There are also Pentax W10, W20, W30 cameras, which are quite old, a bit more expensive and do not have a manual exposure mode. A Pentax Optio 43WR is water resistant, which is a plus when shooting in demanding conditions – for example when shooting storms.
A Ricoh GH100 i GX200 ($440 on eBay) gives you not only the full manual exposure control, but also has a built-in intervalometer and a great lens in this class of camera. It has also a RAW shooting mode that gives you much more freedom in post production (we’ll cover this later in details). You’ll need a shutter release cable to make it work. Some people used also a Nikon Coolpix 8400 (about $100 on eBay)
If you own a compact camera w/out an intervalometer, but you like DIY solutions, check this out: Turning a broken digital camera into a Time Lapse camera
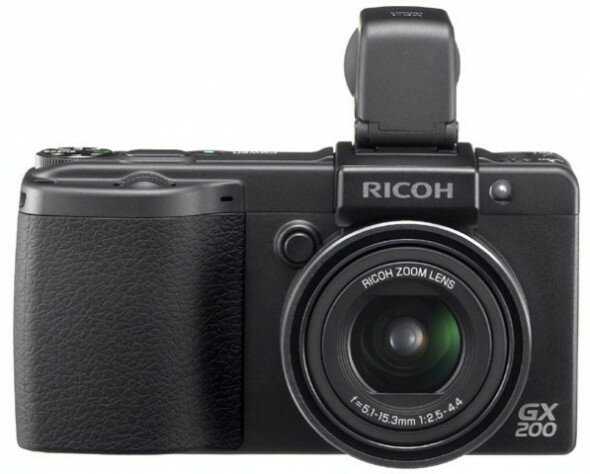
Ricoh GX200
Time lapse shot on a zRicoh GX200
In my opinion this is the most rewarding choice, especially taking into account really low prices of older models. Depending on your goals and pocket, you can start with a second-hand Canon EOS 350D for about $100 or go for modern DSLRs like Canon 550D, 50D, 7D or 5D. Probably you already own one and as long as you’re not a time-lapse addict, you’d rather try to use the gear you already own than buy a dedicated time-lapse camera. I shoot mainly using a 5D MKII, but for less demanding shots have a lot of other older models used as a second cameras.
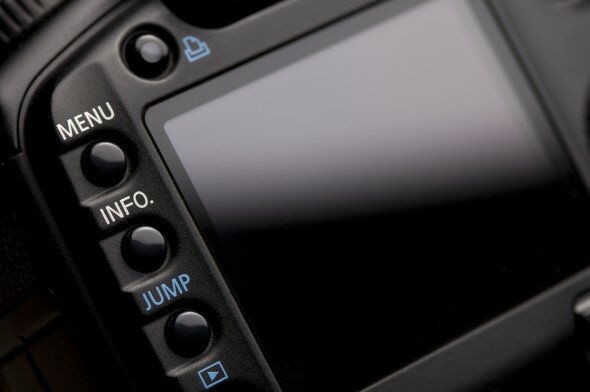
Canon 5D MKII
The basic tool you’ll need is a intervalometer that let’s you control the shutter and fire exposures. If you want just to start and your camera has already the continuous shooting mode, the chapest way to start is to buy a shutter release cable ($5) that allows you to shoot frame after frame continuously. More advanced timelapse will require the precise control of the intervals between frames.
If you own a Nikon, it might have it built-in, but for Canon you’ll need an external device. For the semi-pro range of Canon DSLRs you’ll need a Canon TC-80 N3 or a 3rd party replacement. It has all features you’ll ever need:
TC-80 N3 might be used to control Canon EOS 10D, 20D, 30D, 40D, 50D, 5D, 7D. Other models, such as 350D, 450D, 550D, 60D have different connector and you’ll need a 3rd party controller compatible with them.
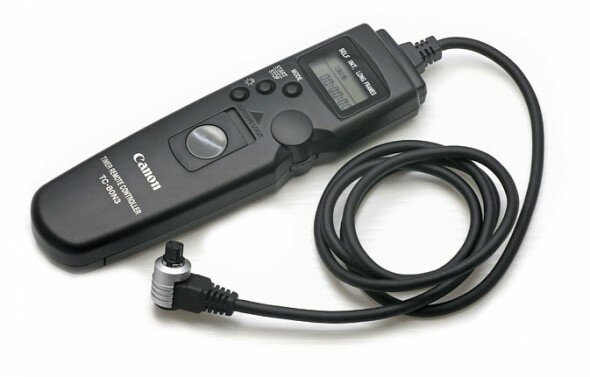
Canon TC-80 N3
A laptop might be used as well. The software that comes with a Canon DSLR cameras allows for programing of the basic time lapse sequences. There are also numerous 3rd party applications dedicated for time lapse. This approach has its limitations, because you’re tethered to your laptop and dependant on the continuous AC power supply.
Once you captured your first set of stills you’ll need a piece of software to convert it to a movie. The free PhotoLapse3 will cover the basic needs, but you’ll benefit much more from a $29.99 Apple QuickTime Pro or $79.00 GB Timelapse. If you already own a professional software such as Adobe Creative Suite or Apple Final Cut Pro, you’ll have much more options. There are also some semi-pro or amateur inexpensive software packages such as Sony Vegas.
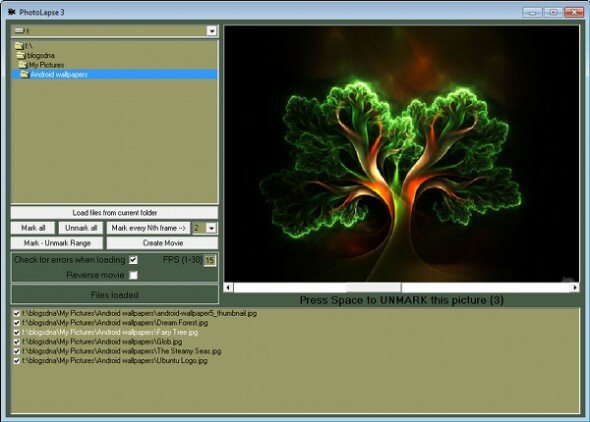
Photolapse 3
We’ll cover the post processing and software-related subjects later in the next chapters.
To make your first steps in time lapse you’ll need a camera, a tripod and a basic software, but if you’re heading for more advanced shooting, you’ll need much more equipment. The following guidelines will refer to more advanced time lapse shooting, so I assume you already own a good class DSLR camera. I use mainly a canon 5D, so the most of my remarks will refer to this model. However they may still remain useful for other cameras.
Simplest time lapse can be shot using nothing but a tripod or a bare camera set on a flat surface. As long as you shoot in interiors, you’ll manage with any tripod. Going outside, especially if it is windy out there, you’ll need a solid, heavy tripod. A rule of thumb is simple – the heavier the better. Some tripods can be equpiied with an additional ballast – that saved my shots many times.
After some time you’ll be a bit bored with a static shots and you’d like to add dimension to your productions by introducing a moving camera similarly to the cinema. You’ll need a motorized Pan-tilt heads and dedicated linear motion control solutions (camera dolly, slider) that start to appear on the market in the recent years. I’ll write much more about motion-controlled time lapse in a separate chapter.
This is a challenge. My 5DMKII is equipped with a great genuine batteries, but a new, fully charged batttery allows for about 2-3 of contunuous shooting. With a battery grip and 2 batteries you can shoot for about 5-6h. It is not enough in many situations and the camera is not the only piece equipment that needs a power. You’ll probably want to use a pan-tilt head, a dolly, slider, external monitor and heaters. That takes a lot of power and you need to consider an efficient external power source.
The equipment I used to use run on 2 voltage levels – 7.4V DC (Canon 5D, a Liliput Monitor) and 12V DC (time-lapse slider, pan-tilt head, heaters). What I recommend is a high capacity 12V Gel type (or lithium-ion) battery. To power low voltage devices you’ll need a voltage converter. Again, the astronomic equipment may be very useful – check these Celestron Power Tanks, which come in 7Ah and 17Ah capacities.
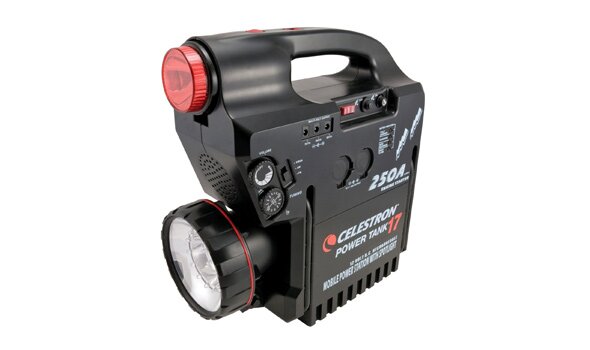
Celestron PowerTank 17
Depending on what DSLR or camcorder you use, you’ll probably need dedicated power solutions. Working on a 5D I shared my experience and solutions in another thread.
General rules and guidelines for buying optics are not a subject of this artcle, but if you needed to buy a dedicated glass for shooting time lapse, you can take into account the following notes. For shooting time lapse you don’t need an automated lens. It is even easier to work with manual lenses as they are much more prone to flicker and easier to use. And you can get a lot of second-hand glass on eBay at a bargain.
Shooting time lapse in the nighttime (as well as in daytime in under some conditions) brings another problem – dew condensation on the optics that can damage your gear and ruin your shots. Wiping your glass every 10 minutes is rather a doubtful solution. Therefore, it is worth it to purchase a set of dew-preventing heaters used by amateur astronomers. When you wrap your lens with such heater the dew won’t condense and you’ll be able to get clear shots all night long. Personally I use an advanced controller – a Kendrick DigiFire 10, but it is only because I take it from my observatory.
For shooting time lapse you can go with the cheapest heater systems. A $150 Orion Dew Zapper kit will be more than enough for your needs.
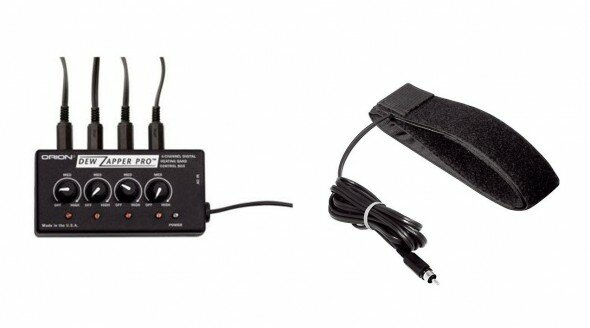
Orion DewZapper Controller
Shooting advanced time-lapse sequences in daytime, especially if it is motion-controlled requires that the light reaching the sensor of the camera be reduced significantly. As far as I remember on my 5D with ISO 50 and F/22 lens I can go with the exposure times about 1-2 seconds in the daytime, but it significantly reduces control over the depth of field. What you need to regain the flexibility and freedom of composing shots, are ND filters.
I use a B+W 1000x (77mm) and Hoya ND 3.0 400x. If you own a set of lens and each of them has different diameter, it is worth it to consider a Cokin system allowing to use a set of filters for different lenses.
A great choice for shooting time lapse is also an ND-Fader – a filter based on linear and circular polarizer. One of these is rotatable and thus allows for controlling the amount of light transferred / blocked.
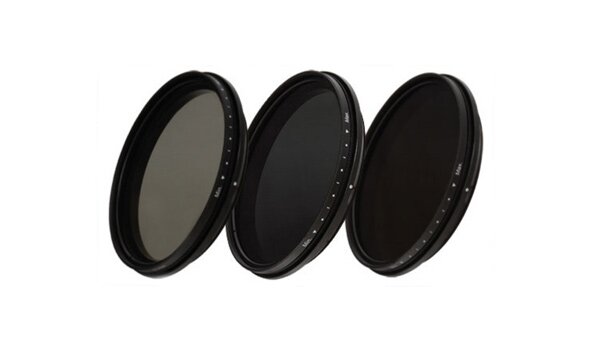
ND Fader filters
![]()
o rajusiu, rzeczywiście dużo sprzętu.
pozdrawiam z drugiej strony mostu – z Kromera.